
The decommissioning blues: Readying Red Thread for a rainy-season snooze
June 2015
One of the things we’ve learned since buying our boat is that not using a boat at all is far more detrimental than using it all the time. Walk the docks of almost any marina, and you’ll quickly eyeball which boats are used regularly and which have been abandoned in solitary confinement. Without question, saltwater is the most corrosive agent on earth (have you seen the Grand Canyon?!), and any boat left unused in briny water will inevitably suffer.
The Red Thread is our home, and we wanted to leave her in the best condition we could. We spent eight long, sweaty days preparing her for hibernation and agree that while choosing to remain in Central America was a major decision, decommissioning her may have been even more exhausting! In fact, the decommissioning and recommissioning processes may have been sufficiently intense to deter us from ever leaving our boat again!
After all was said and done, we had a fancy drink at a fancy restaurant (complements of Tor and Jules) and readied ourselves to kick ass at life in America for six months! For those of you who are interested in what we did to prepare The Red Thread for six months of residence in Costa Rica, read on! Overall, we feel pretty good about how we buttoned her down. When we returned to her nearly a month ago, she was in pretty great condition!
Note. Most boat owners prefer to store their boats in a “dry slip”, meaning that the vessel is hauled out of the water and secured on stilts. After wrangling with options, we elected to keep The Red Thread at Marina Pez Vela, which meant she’d remain in the water. This added some extra quirks to our decommissioning process. The list below details what we did and is organized by system, not order of importance.
De·com·mis·sionˌdēkəˈmiSHən/: To take a ship out of service.
| System | Tasks Completed |
| Anchor | 1. Scrub and inspect the chain and nylon rode. We carry 250 feet of 3/8” chain and another 200 feet of heavy-duty nylon rode. Both were due for a good freshwater scrub. Although we have yet to anchor somewhere deep enough to require we pay out all our chain, our rode was grimy from having wet, dirty chain piled on it in the anchor locker. In addition to scrubbing, we inspected both for any weak points and opted to remove the two lead chain links, as they were looking rough. |
| 2. Regalvanize the anchor. After three years of owning The Red Thread and spending many a night gunkholed in saltwater coves and bays, our 45-pound Delta was looking worn. Regalvanizing will add life to one of our most precious pieces of equipment. | |
| Cockpit | 3. Scrub cockpit teak and store below. We placed the clean teak below deck to prevent UV damage. |
| 4. Remove bimini, scrub, and store below. The bimini is the large sunbrella structure that stretches over the cockpit and provides us with shade. We cleaned it and sealed it in a watertight bag below deck to reduce UV exposure and windage during rainy-season storms. | |
| 5. Clean cockpit cushions and store below. Again, storage away from the sun will extend the life on key pieces of equipment, like our cockpit cushions, which keep our bums comfy. | |
| Deck, Hull & Rigging | 6. Polish all stainless, including stanchions, bow pulpit, cockpit railing, helm, bimini struts, and wind generator pole. This was monumental task that Neil took on, while I addressed most of the tasks on the interior of the boat. He spent three days polishing our stainless in the hot Costa Rican sun. We polish our stainless quite regularly but have noticed that in the tropics our stainless starts looking dodgy very quickly. The polishing process is important for removing small bits of corrosion that, if left unattended, can cause deeper damage. |
| 7. Flush boom vang with freshwater. Again, salt is corrosive. We wanted all elements of the boat to be as clean as possible before we departed. | |
| 8. Flush and lubricate cockpit line clutches. Clean and lubricate; clean and lubricate. | |
| 9. Replace speedo paddle wheel blanking plug. Even when we’re regularly on the move, the paddle wheel that tells us our speed through the water tends to become salt-crusted and stop working. Six months of sitting might seize it completely! We removed the wheel and plugged the thru hull with a blanking plug. | |
| 10. Wash the hull. Keepin’ her clean! | |
| 11. Run messenger lines. To protect any lines (i.e., ropes) that are exposed as they run up the mast, we ran messenger lines (i.e., small old ropes we were happy to sacrifice to the sun). All of our lines run directly to the forward portion of our cockpit, which is shaded by our hard dodger, thereby shielding them from UV damage. | |
| 12. Scrub lines and soak them in fabric softener. Any lines that were to be unused in our absence were scrubbed in freshwater and fabric softener to remove salt, which left them soft and pliable. We stored those below decks. | |
| 13. Secure a tarp over the boom. We have in-boom furling, so our mainsail is almost completely protected by a cover. That said, the luff of the sail is exposed. We secured a tarp around the forward-most portion of the boom to protect that part of the sail and also to prevent birds from making it into a home. | |
| 14. Go up the mast and check fittings, welds, spreaders, lights, halyards, cotter pins, turnbuckles, sheaves, swages and wires. It goes without saying that keeping our mast standing is of critical importance. I hoisted Neil up the mast, where he checked signs of wear, corrosion, or weakness all of the key hardware components that keep her steady in the sky. This is a task we do every three months or so. | |
| 15. Use Lanacote on turnbuckles and boom universal joint, and lubricate pulley blocks. Corrosion protection and lubrication are so very important. | |
| 16. Replace propeller zinc anode. Electrical current in the water is a particular concern when a boat is in a marina amongst other vessels. A sacrificial zinc anode is kept constantly on a boat’s propeller to prevent the electrical current from gnawing at the bronze propeller itself. We placed a new one just before leaving, in hopes that it would survive the full duration of our absence (which it did). We also left a spare, just in case it needed to be changed by the person we hired to keep an eye on Red Thread while we were away. | |
| 17. Add dangling zinc for extra protection. Although we have a zinc anode on our propeller, dangling an extra one over the side would provide an additional means of protection, as well as an easy-to-access gauge of the likely state of our propeller zinc. | |
| 18. Clean deck scuppers. Deck scuppers are the drains that allow water to exit from the cockpit and decks. Quepos receives over 12 feet of rain annually, most of which comes during the rainy season (the timeframe during which Red Thread would be residing there). Ensuring they were free of debris would allow the rainwater to exit the boat, rather than being trapped and creating nasty pools that would invite growth. | |
| 19. Scrape the bottom of the boat. Barnacles (conchas en Español) grow on the bottom of boats at a furious pace here in the tropics! In the Pacific Northwest, we could go several months without scrubbing the bottom and even then would only find a handful of barnacles and some green fuzz. Here, it is another story. If left to grow, the little monsters can eventually bore into the fiberglass! We gave her one last good cleaning and then hired someone to scrape her one a month to ensure she stayed clean. | |
| 20. Polish window panes. We used Craftics Plasti-Cleaner on all of our acrylic windows, which helps to buffer them against the effects of UV damage. We then covered all of the hatches on the cabintop with sunbrella covers, but our other portholes remain exposed. Given that our boat has a deck saloon (tall cabin with big windows), in the world of sailboats, we have a lot of window to protect! In hindsight, we wish we would have taken the dodger windows down altogether. | |
| 21. Scrub the cockpit. Keeping a clean, clean, clean boat (inside and out) helps unwanted homesteaders (e.g., birds, cockroaches, rats) at bay. | |
| Dinghy & Outboard | 22. Sew a cover for the outboard motor. Our outboard motor for our dinghy is secured to the aft of The Red Thread, where she is beaten relentlessly by the fierce tropical sun. I sewed an outboard cover from a large scrap of sunbrella, which was given to us by a canvas shop in San Diego, CA, who let me rummage through their odds-n-ends box.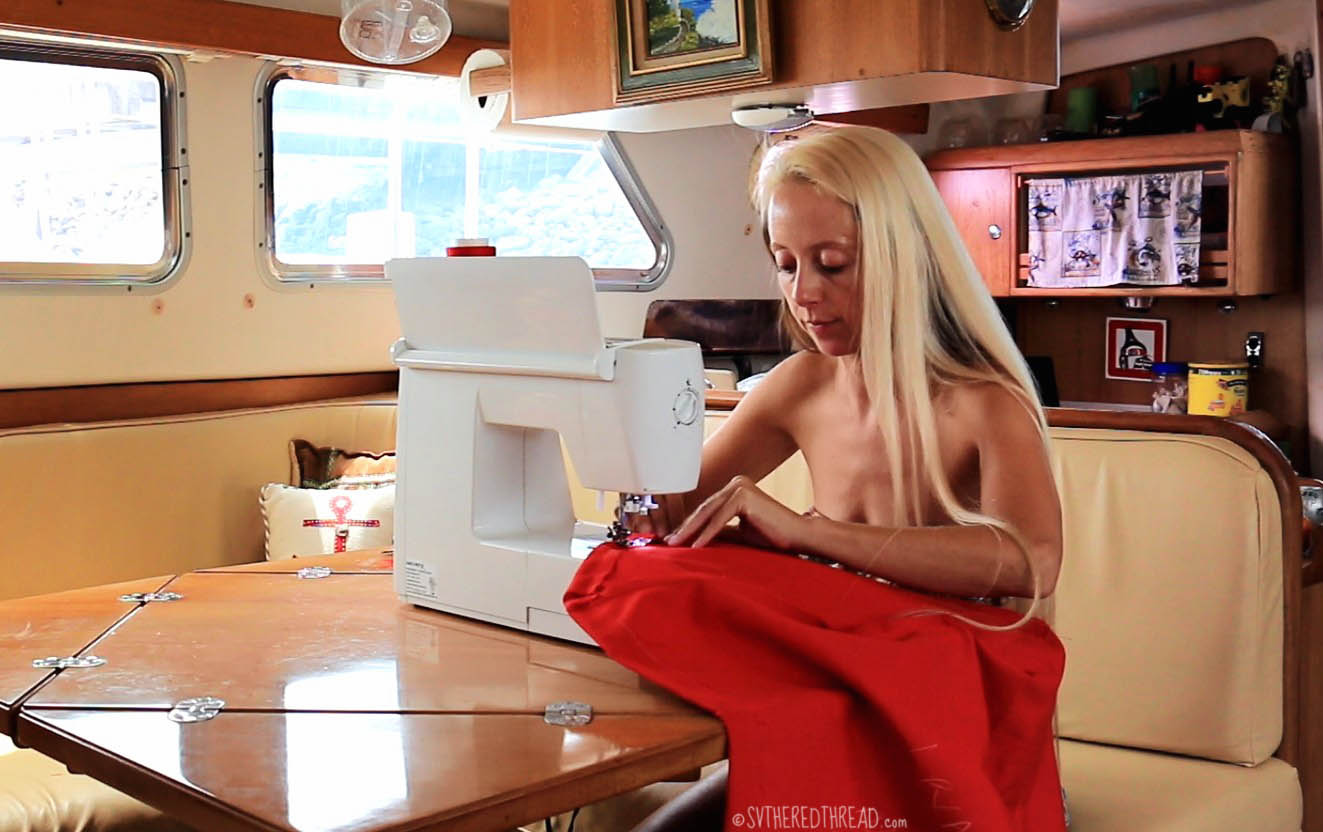 |
| 23. Replace the outboard lock. Although theft was the least of our concerns in leaving The Red Thread at Marina Pez Vela, it is good measure to secure valuable items that could easily be removed by someone with sticky fingers. We keep wide padlocks aboard so that we can lock together the metal handles that secure the outboard in place, which makes the motor essentially impossible to remove. | |
| 24. Flush outboard engine with freshwater. Salt and sun…get ’em off! | |
25. Change outboard motor oil. She was due for an oil change and we decided it make more sense to leave her with fresh, clean oil than to allow her to sit for half a year with old oil. |
|
| 26. Wash and dry dinghy and store in case. If you haven’t noticed a theme here, it is that UV damage is a real problem! We washed the salt off our dinghy, Ms. Sassy; deflated her; and zippered her into a heavy-duty protective cover to keep her safe. | |
| Engine and fuel | 27. Fill diesel tank and add a good dose of biocide. It is good practice to keep a diesel tank full to avoid condensation from building and dripping water into the fuel over time and to reduce potential for biologic growth. So we filled our tank to the brim! We also added a dose of biocide to optimize the health of the fuel. |
| 28. Polish our diesel fuel. Since we put diesel from Neah Bay, WA, into our tank, we’ve been waging an ongoing battle against grime and biologic growth. This has caused a myriad of funky problems, including the need to replace our Racor fuel filter exceedingly often, as well as clean out the fuel bowl and replace the seals repeatedly. Paying for this service was an investment in the health of our engine (and our sanity). We did not want to leave grubby fuel in our tanks that would grow who knows what in six months. | |
| 29. Rebuild Racor fuel filter. We replaced the bowl, filter, and all seals…hopefully for the last time in a long while (see item 28). | |
| 30. Change engine oil, transmission oil, and engine coolant. This is standard maintenance that we elected to do before leaving the boat, as we felt better about leaving her with clean fluids. This would also save us time in the recommissioning process. | |
| 31. Flush engine with freshwater. Our engine is cooled by water that is drawn from the sea. When a boat is used regularly, fluids and seawater are flushed through the engine, which reduces risk of buildup that might harm the motor. By flushing our engine with freshwater, we removed the risk of buildup that may have resulted from stagnant seawater during our absence. | |
| 32. Clean engine air filter. An engine has to breathe. Enough said. | |
| 33. Replace engine serpentine belt. Roughly a thousand hours on the old belt meant it was time to put on a new one. | |
| 34. Clean engine surface and paint any rusty spots with rustoleum. Decommissioning provided an opportunity to get up close and personal with all aspects of the boat. Any spots that show wear on the engine are treated by rustoleum paint, which prevents further corrosion. | |
| 35. Place fresh oil-absorbant sheets below engine. If we have any type of leak in our absence, the oil pad/diaper would alert us upon our return. | |
36. Replace starter motor. Our starter motor was on the fritz! Fortunately, our friends who met us in Puntarenas brought a replacement. We opted to install it before our departure to make sure it was working well, and we had the old one rebuilt. |
|
| 37. Give away gasoline in jerry jugs. We didn’t have any gasoline stabilizer and figured it wasn’t the wisest idea to leave jerry jugs of flammable fuel in the anchor locker to bake (and possibly explode) in the heat. | |
| Galley | 38. Clean and polish BBQ grill and store below. We use our grill frequently, and it was nasty. We did our best to clean it and then shoved it into a black, plastic garbage bag. |
| 39. Clean stovetop and oven and remove stove and clean behind it. Cleaning thoroughly is the single best way to discourage critters from coming aboard. If your boat is a buffet, don’t be surprised if scavenging bugs and rodents want to feast. Well, I’m a bit embarrassed to say that the area behind our stove was a bit too inviting. The entire stove had to be removed to clean it, but it was worth the time and effort. | |
| 40. Inventory remaining food and store in heavy duty tubs with lid. I’d like to think I’m pretty good at making sure we have food to eat. Perhaps a little too good…we still had a fair amount of canned food and other goods. Because heat can cause liquid to expand, and I’ve heard tales of cans exploding (which may then invite hungry critters), I stored all of our remaining food stuffs in sealed plastic tubs to ensure that any potential mess was contained and the items could not be easily accessed by varmint intruders. Note. If you have dried fruit that is still a bit moist (e.g., mangos, apricots), just toss it. The dried fruits of those varieties were black after months of 100°F temperatures. Craisins and blueberries were fine. | |
| 41. Fill and disconnect propane tanks. There is absolutely no reason to leave propane tanks connected if you are not using them. Whenever we leave the boat for more than a day excursion, we turn ours off. | |
| 42. Clean out the refrigerator and freezer, shut off power, and prop open for air circulation. Leaving a dark, damp place closed for a prolonged period of time is a recipe for the big dank ‘n nasty. | |
| 43. Remove all perishable food from the boat. We’re leaving the boat for a long time…this is obvious. | |
| 44. Store silverware and cooking utensils in Lock & Locks. Silverware will tarnish while you’re away, so storing eating and cooking utensils in a ziplock or tupperward is prudent. | |
| 45. Scrub and sanitize sinks and the dish drainer. Duh, no explanation needed here. | |
| Interior | 46. Place roach traps around boat. To be safe, we left sticky non-toxic roach mats around the boat. There were few critters on the mats upon our return, but there was one cockroach…gulp. |
| 47. Declutter all cabinets and storage bins. Decommissioning was a laborious opportunity to sort through every cabinet on the boat, to remove unnecessary items, and to wipe every surface with a 50/50 vinegar-water solution. | |
| 48. Wipe down counters, walls, and ceilings with 50/50 water vinegar solution. Clean, clean, clean. This task was completed jointly with decluttering and sorting, and it took forever. It also meant that we got rid of some things that we no longer needed and to get better organized. | |
| 49. Wash all sheets, towels, rugs, and clothing and store them in sealed bags. We cleaned all fabrics and sealed them with dryer sheets to protect them from any moisture that might creep into the boat. This also made it more likely we’d return to decent smelling belongings. We also sealed all pillows in garbage bags and taped them shut. | |
| 50. Turn cushions and aft cabin folding mattress. Turning cushions and mattresses allows for better air circulation, so we wiped down our main cabin cushions and turned the folding aft cabin mattress on its side (there was nothing we could do for the v-berth mattress). | |
| 51. Remove all floor access panels and clean beneath them with vinegar and water. Should you choose to peer beneath your boat floor panels, prepare to turn up your nose. Even you sail in a region not known for dust, we humans slough off countless cells (e.g., skin, hair, fingernails). Moreover, even if you try dutifully to keep salt out of a boat, it inevitably makes its way inside. We turned up floor boards, vacuumed beneath them, and wiped them out with vinegar-water. | |
| 52. Cover hatches with hatch covers and close blinds. This prevented UV from penetrating the windows and reaching the interior surfaces. It also helped to keep the interior temperature of the boat as low as possible. Low is really an ill-fitting adjective here…it was a stifling 100°F most of the time. | |
| 53. Fumigate interior with a bug bomb. This was recommended to us, but we didn’t actually do it. Had we had any issues with bugs during the season, this would have been a priority. | |
| 54. Open lockers to allow air circulation. Circulating air reduces risk of mold and gives critters fewer places to hole up. | |
| 55. Place a dehumidifier in main cabin. We do not own a dehumidifier, but we were able to rent an industrial-sized one from the marina. Given that Quepos gets heaps of rain, this was a worthy investment! We placed the dehumidifier on our galley counter and ran the hose to our galley drain (this was the only seacock we left open). | |
| Miscellaneous | 56. Convert jib sheets to dock lines. There is a fair amount of surge in Marina Pez Vela, so we wanted to be certain we had extra lines ready, if needed. Our jib sheets were ready to be retired, so we placed them well in view beneath our hard dodger. |
| 57. Make dock line chafe guards. Because of we expected chafe to be a concern, I constructed chafe guards using a combination of plastic tubing and sunbrella fabric. They held up very well, so I’ll likely write up a how-to post on them in the future. | |
| 58. Clean and declutter tacklebox. Decrepit items were tossed and the box was wiped out. | |
| 59. Inventory boat lubricants and store in heavy duty tub. We have over 70 lubricants, solvents, greases, and oils aboard (hard to imagine, right?!). We updated our inventory so we knew which ones we should purchase while back in the US (purchasing boat parts and checking a bag is generally cheaper than shopping for specialty boat parts in a foreign country). Go figure that after all that effort, I managed to later screw up spreadsheet, and we were left us to buy based on memory. Oops! | |
| 60. Remove batteries from flashlights and other electronics. This was a precaution, as batteries can leak/explode, which can damage the device. Doing this also meant that all devices would start out next season with fresh batteries, which would give us an idea of how many additional batteries we’d need to purchase before we depart the Americas. | |
| 61. Store cleaning supplies in a sealed tub. A strategy to avoid a hazardous mess in the event that any chemicals leaked or exploded. | |
| 62. Take out trash and scrub trash bins. Again, we cleaned and disinfected everything we could think of in order to discourage critters. | |
| 63. Confirm guardianship contract with Tim. Although we could have chosen to leave Red Thread to fend for herself entirely, we didn’t feel comfortable being so far away without having someone committed to keeping an eye on her. We hired Tim from Quepos Yacht Care for the job. Every two weeks, he scrubbed the green slime from her decks and once a month, he dove her to clean the bottom and check the status of our zinc. He also climbed aboard periodically to check the bilge and sniff around for anything else that might be out of sorts. Every so often, he would send us photos of Red Thread, and he was available via email on a daily basis. Having a “nanny” was money well spent. Tim’s services were excellent, and the peace of mind his presence gave us enabled us to sleep without worry about our home. | |
| 64. Review equipment service dates. Some equipment requires recertification or renewal. We checked things like our EPIRB and life raft, in particular. | |
| 65. Update spare parts inventory. As with the lubricants, we wanted to make sure our inventory was accurate, so we knew what parts of purchase while back in the States. This also involved taking measurements and photos of a several items we knew we needed but for which explicit part numbers, lengths, or sizes were not available or would not be easily accessible after our departure (e.g., toe rail cleat, jib sheet length). | |
| 66. Photograph the boat and send to Pantaenius with a copy of our plans. Our insurance company requested a storm plan that required information about who would be available to address Red Thread’s needs in an acute emergency, the size of our dock lines and how many we have, etc. We also sent them photos, so that in the event anything should happen in our absence, they would have a visual of where and how we had left her. | |
| 67. Fill scuba tanks and place them below decks. Nuff said. | |
| 68. Remove porthole window screens. The windows wouldn’t be opened anyway, and leaving them in place would just expose them needlessly to UV rays. | |
| 69. Wash and store paddle board. The theme of protecting everything we could from UV and saltwater continues… | |
| 70. Scrub and secure kayaks. We decided to leave our kayaks strapped to the mounts on either side of the boat, which was a fine idea…until the first big rain storm (silly us, we knew we were leaving during the rainy season). Tim informed us they were full of water. He flipped them and tied them on top of the dinghy, where we probably should have put them in the first place. | |
| 71. Bag the propeller. We’d heard lore from other cruisers that securing a heavy, black plastic garbage bag around the propeller will help prevent barnacle growth. We decided to try it. As it turns out, the bag had begun to disintegrate by the end of the six months, but ultimately it seemed to do a decent job protecting the prop. This would probably be a particularly handy technique if you were leaving your boat for the long-haul without ongoing below-the-waterline care. | |
| Plumbing | 72. Flush holding tank with freshwater. Holding tanks are vile cesspools of urine, feces, and saltwater. Rather than drain them and leave them dry, we filled them full of freshwater and pumped them out repeatedly (about five times). We then left them partially filled with freshwater to prevent whatever may have been left at the bottom from becoming crusted on…pleasant, I know. |
| 73. Clean heads (i.e., toilets) and flush heavily with freshwater. We have two heads aboard. The forward head draws water from our freshwater tank, which is a major waste of precious agua dulce when cruising. We only use that head when the other isn’t working (e.g., when we sailed from Mexico to Costa Rica). The aft head, on the other hand, flushes by drawing in saltwater from the sea. Since we were leaving our boat in a wet slip and hired someone to check in on her, we decided to leave water in the toilets. There are arguments for vacuuming out the water from the heads and for leaving them wet. The argument against the former is that lack of moisture can cause seals to dry out and fail. However, mixing saltwater and urine (the standard state of our main head) causes a calcium-like buildup to develop which, over time, narrows the pipes and leads to blockages. As a result, we elected to close the seacock and flush a lot of freshwater down the aft head before we left. We then asked her caretaker to intermittently flush more freshwater through the head while we were away. | |
| 74. Clean the bilge. We gave the bilge a good scrubbing but left her wet. Had we stored her on the hard, we would’ve vacuumed out the remaining water, but being that we were in the water and our bilge is always a bit wet, we didn’t bother. | |
| 75. Clean bilge pumps and test float switches. The integrity of the pumps that remove excess water from the bilge cannot be understated. They would keep The Red Thread from sinking if somehow water began to enter while we were gone! | |
| 76. Lubricate seacocks. Routinely exercising our seacocks by opening and closing them is something that Neil and I have not been particularly good about doing. We learned this the hard way when the handle of one snapped off (fortunately in the closed position) earlier in the season. We lubricated and exercised all of them before we headed north! | |
| 77. Pickle the watermaker. Watermakers can have a long lifespan, but only if they are maintained properly. When a watermaker is in use, it must generally be run (i.e., used for making water) or flushed (i.e., flushed with freshwater). If the system is not going to be used for a prolonged period of time, it is necessary to “pickle” it. Pickling our watermaker was simpler than we anticipated and required that we fill it with chemicals to preserve the membrane. Fortunately, we were able to pick some up during our jaunt to Panama City. Our membrane was replaced only four months earlier and cost several hundred dollars. We were definitely keen on keeping it healthy for next season! | |
| Power | 78. Wash flip-up solar panel and store below. Three of our four solar panels live permanently affixed atop our hard dodger. The fourth, however, is removable and clips to our port aft quarter rail. We wanted to protect that panel, so we washed it up and stored it down below. |
| 79. Clean connections on d/c panel. Corrosion begets corrosion. Neil made sure that all of the electrical connections were nice and clean. | |
| 80. Change Honda 2000i generator oil. We actually didn’t get around to doing this before we left…but we intended to! | |
| Sails | 81. Remove jib sail, clean, and store below. Although our North Sails furling headsail has a strip of sunbrella fabric along the leech that helps to protect the sail from UV damage when it’s rolled up, there was no reason to leave one of our most important pieces of equipment above deck. We took the sail down, hauled it ashore, washed and folded it nicely, and stored it below deck. |

So this comment has nothing to do with boats, or sailing…but i had to say that I LOVE the shoes you are wearing on the picture above…LOVE!!!
Hope all is great!!!! Xoxo
LikeLiked by 1 person
Attention to detail, girl. One of the things I appreciate about you 🙂 ~Jessie
LikeLike
That’s a lot of work! You did far more than just standard decommissioning though, some of those things are regular maintenance that was deferred during your cruising.
LikeLiked by 1 person
Indeed! It is true that some were standard maintenance. In general, we didn’t defer any of them during cruising though. We stayed pretty on top of maintenance along the way (which was tough at times!). Some of the tasks simply coincided with the time of our decommission or gave us peace of mind to do before our departure. ~Jessie & Neil
LikeLike
Hey guys
Great piece of advice
So many things I forget about
Hope all is well
Bill
“KooK”
Sent from my iPhone
LikeLiked by 1 person
Excellent list! A lot of work and a lot of very good advice. So glad you got a dehumidifier – we LOVE ours – keeps Celeste mold-free and smelling fresh despite wintering in the rainy Aleutians…. You probably already know this, but cleaning vinegar clears up that calcification in the head easily 🙂 Good luck with your time in the States!
LikeLiked by 1 person
I did NOT know that 🙂 thanks for the tip! ~Jessie
LikeLiked by 1 person
It works a charm!! Keeps things from smelling bad, too 🙂
LikeLike
A wonderful, helpful, well written post that I am going to refer to when we leave our home in a few months!
LikeLiked by 1 person
Glad you found it helpful! Good luck when your time comes! ~Jessie
LikeLike
What a great, thorough list! I will be copying and pasting into my notebook for future use! How long did it take you to get all of that done? P.S. The shoes are the finest sailing shoes I’ve ever seen! 🙂
LikeLiked by 1 person
We spent about a week in total. Thanks for the comment on the shoes! Variety behind Keens, flipflops, and Sperrys is important! ~Jessie
LikeLike
Pingback: Voyage stats: Our months FOUR thru EIGHT | s/v The Red Thread
Pingback: Voyage stats: Months FOUR thru EIGHT | s/v The Red Thread
Pingback: Isla Isabela, Galápagos: Boobies, penguins, & nature’s masterpiece | s/v The Red Thread
Pingback: All work and no play… | s/v The Red Thread
Pingback: Recommissioning: Days ‘n days in the yard on the hard + Ep. 9 VIDEO | s/v The Red Thread